

The retro emulation scene has evolved a lot since the mid-2000s, when I was struggling to run Nintendo DS and GameCube games on my laptop. These days, PCs are more than powerful enough to play even 3D games, and it doesn’t even have to be a particularly powerful one.
But what’s even better is that you don’t even have to limit these games to a single device. There are now solutions that let you store these games on just one computer and stream them to any device in your house. I set up my own system for doing exactly this, and it’s wonderful.
Creating my own retro gaming server
RomM to the rescue
As with anything related to self-hosting these days, the easiest way to get started is to use Docker, though you can also use a home lab running Proxmox if you want to use a PC that you know will be on all the time. I’m using a service called RomM, which does have a Proxmox helper script, but I wasn’t able to get it working, so I’m sticking with Docker on another PC in my house.
Using Docker Desktop, I can deploy a RomM container relatively easily with the Compose file provided in the official instructions. Simply copy the content, modify the necessary fields (such as the username, password, and secret key), and save it as a compose.yml file. Then, browse to that directory and run docker compose up to deploy the RomM server.
In the compose file, you can specify a path for your RomM assets, including ROMs themselves. Using Docker Desktop on Windows, you can find folders on your host Windows machine and mount them in a Docker container, which is what I did since this PC already had all my games.
Otherwise, you can upload files through the RomM web UI and add games that way, though I had issues where many of my files returned errors when added to the library. Perhaps it was because the games were all inside .zip files, but this was somewhat frustrating, and it’s worth keeping in mind.
RomM isn’t actually the only way to do this, and I’ve tried something like this before with RetroAssembly, which is also very convenient. I didn’t have any issues uploading games to that one in my previous tests.
Related
I built a retro gaming library on my NAS, and RomM makes it feel like Plex for games
Transform your game collection from a cluttered mess of folders into a stunning, searchable library with RomM’s game management magic.
Setting up my library
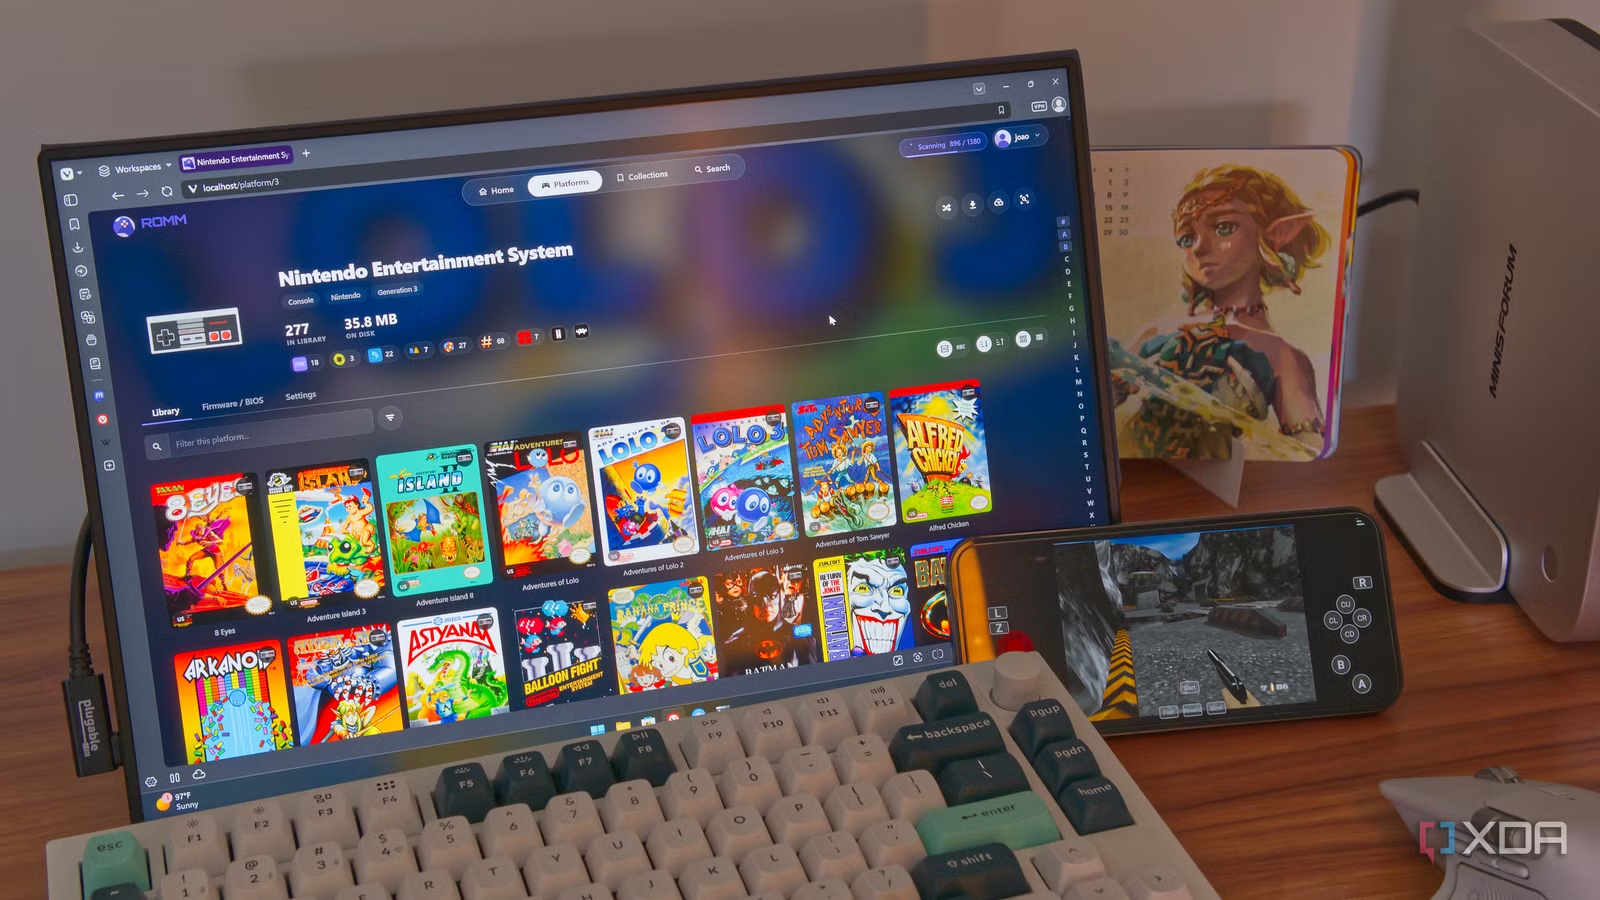
RomM has a beautiful UI
With the RomM server up and running, I could access it from any machine in my network. If I want to use my host, I can just enter 127.0.0.0:80 (or whatever port I set for access) to navigate to the web UI and start from there.
RomM automatically detects the folder structure of your ROMs folder based on two options, with so-called “structure A” being preferred. This is also the structure used by default for something like EmuDeck, so I can easily re-use my existing library this way. Otherwise, RomM can create its own folder structure for you to upload files into. In that case, you can select which platforms you want in your collection so that the appropriate folders can be created.
Then, you can link to a wide range of services for scraping game metadata, or RetroAchievements if you want to add specific goals to some of these titles. Finally, just create a username and password, then sign in to the service, which has a beautiful, modern-feeling UI. You can also create more users if you want other people to have access to a central game server.
From here, you can start uploading ROMs, or scan your library to find the existing files. I kind of skipped all the metadata scraping steps, but even just a basic scan will give you some game artwork to make games easier to identify, so you don’t need to fuss if you’re impatient like I am.
Once you’re done scanning (and it can take a while if you have a lot of games), you can find all your games in the Home page, ready to pick and play. Games are organized by platform, though you can also create curated collections around whatever topic or franchise you want. Recently-played games are also prominent, so it’s easy to pick up where you left off.
I can play my games anywhere
All with unified saves
Of course, the whole point of this idea is to make my games playable everywhere, and that’s exactly what RomM does. Since it’s a server running on my PC or in my home lab, I can just leave it running and access it from any other device in the house. All I need to do is enter the IP address of the host PC (in my case, it’s 192.168.8.173:80), and log in with my user account.
RomM works on most devices. On phones, it gives me touch-based controls, which are very important in a pinch, even though I hate them. What’s especially great is that it also works with controllers. Both the RomM UI itself and the games support controller input on my phone or other devices, so I can still play my games more comfortably.
Related
I turned my old phone into a retro gaming machine with this app, and the UI alone makes it worth trying
The best way to enjoy the classics on the go
And because it’s all coming from the same server, not only do I always have access to the same games on every device, but all my saves are on the server, too. I can play on my phone, save and exit, and continue playing on my PC right where I left off. It’s just a seamless experience going from one device to another. I never have to redownload games or set them up on each device; it all comes with me wherever I access RomM.
The best way to enjoy the classics
There are plenty of great emulation solutions and frontends that you can run on specific devices, such as Emulation Station on PC or iiSU on Android. And while those solutions are great for the options and customization they offer, RomM is the best way to make my games playable across all my devices while keeping them all in sync. If you value that flexibility, RomM may be the best way to play these old titles, and it comes highly recommended.